Setting Up Your Calendar for the First Time
Step-by-step instructions to configure your calendar preferences and get started.
Evallo’s Calendar is designed to simplify scheduling and streamline your operations. Setting it up properly ensures a smooth and efficient workflow for your tutoring business. Follow this guide to configure your Calendar and unlock its full potential.
Setting Up Your Calendar for the First Time
Before You Start: Add Your Users
This guide assumes you’ve already invited parents, students, and tutors to the platform. If you haven’t done this yet, check out our guide on inviting users for step-by-step instructions. Once your users are added, you’re ready to begin.
Step 1: Access the Calendar Settings Pop-Up
To start setting up your Calendar:
Click on the gear icon in the top-right corner of your Calendar screen.
A pop-up will appear, prompting you to configure your default settings.
This pop-up is your gateway to personalizing the Calendar for your business.
Step 2: Configure Default Settings
Within the pop-up, you’ll see options to set up essential defaults:
Default View: Select Weekly, Monthly, or Yearly as your preferred view for the Calendar.
Default Time Zone: Set your time zone to ensure accurate scheduling.
Default Service and Topic:
Choose a default service (e.g., Math Tutoring) and an associated topic (e.g., Algebra).
If no services or topics are available, navigate to Settings > Services to create and enable them.
Default Location:
Set a primary location for in-person sessions, or use the default "Online" option.
You can add multiple addresses under Settings > Locations and mark one as primary.
Default Meeting Link: Add a link for virtual sessions (e.g., Zoom or Google Meet) to pre-fill event details.
Step 3: Explore Advanced Settings
Click the Go to Advanced Settings button in the pop-up to access further customization options. Advanced setting
Session Tags and Reconciliation
What Are Session Tags?
Session Tags help you quickly summarize key session details when reconciling events, saving time during busy schedules. They are customizable labels that can be added to sessions. They simplify recording key details when you are unable to take notes as you are reconciling your sessions.
How to Create Tags:
Navigate to the Session Tags and Reconciliation tab under Calendar Settings.
Click Add New to create a heading (e.g., "Topics Covered").
Add tags under this heading (e.g., Math, Grammar, Reading).
Repeat for additional headings, such as "Student’s Mood" with tags like Engaging, Inspired, or Focused.
Enable the tags (by turning the toggles on) to make them visible during session reconciliation.
Where Tags Appear:
Tags show up on the Session Details Page, where you can quickly click and assign them to completed events.
Permissions
Permissions allow you to control what tutors, parents, and students can do on the Calendar, giving you full administrative control.
Available Permissions:
Default Calendar View (Weekly, Monthly, Yearly).
Allow tutors to delete scheduled sessions.
Allow tutors to create new sessions.
Allow tutors to schedule consultations.
Allow students and parents to view session tags.
Send reminder emails to parents before scheduled sessions.
Send reminder emails to students before scheduled sessions.
How to Configure Permissions:
Navigate to the Permissions tab in Calendar Settings.
Enable or disable each permission based on your preferences.
Customize email reminders by choosing the timing from a dropdown (e.g., 1 hour or 24 hours before the session).
Integrations
Integrations make it easy to connect your Calendar with external tools, ensuring a seamless workflow.
Supported Integrations:
Google Calendar and Meet: Sync schedules and generate meeting links automatically.
Zoom: Connect your account for virtual sessions.
Outlook: Keep your Calendar synced with Outlook for better coordination.
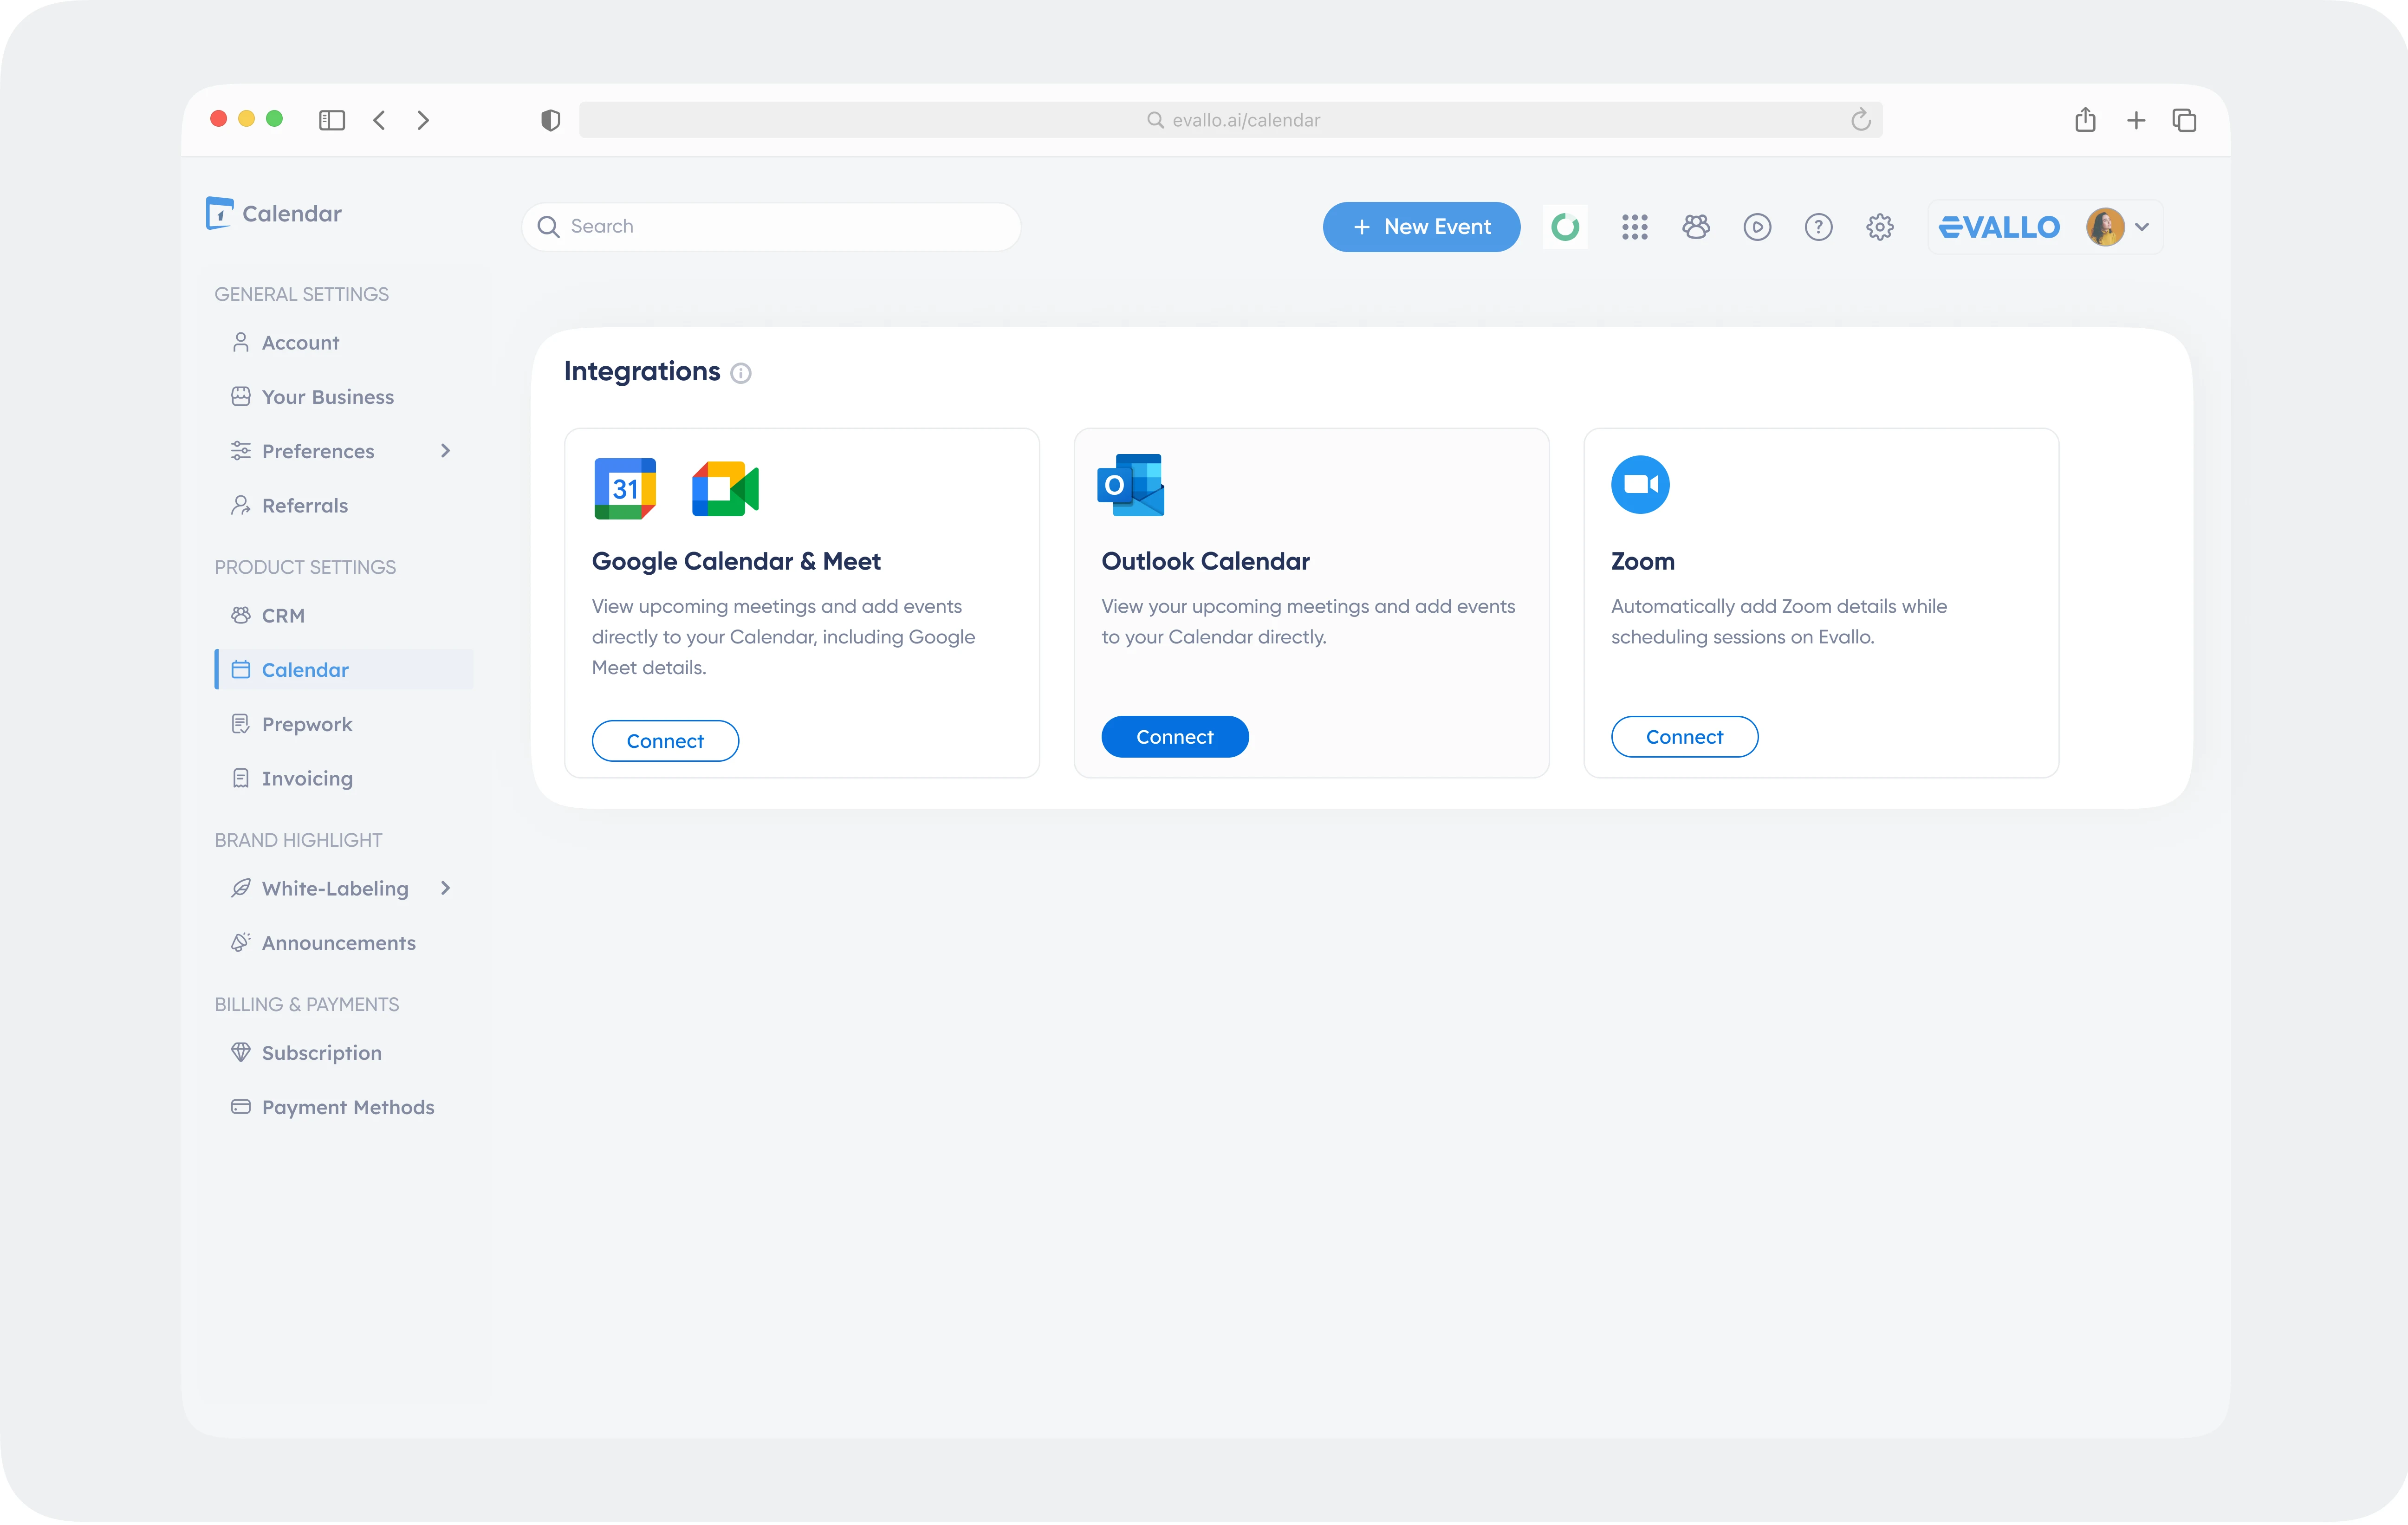
How to Set Up Integrations:
Go to the Integrations tab
.Click Connect next to the platform you want to integrate.
Follow the prompts to authenticate your account and complete the setup.
Step 4: Set Your Availability
Your availability determines when sessions can be scheduled. Set it up early to avoid scheduling conflicts.
How to Set Availability:
Go to Availability in the sidebar.
Define your working hours for each day of the week. For example:
Monday to Friday: 9:00 AM – 5:00 PMSaturday: 10:00 AM – 2:00 PMSunday: Off
Click on the plus ╋ button to add another availability for that day.
Press the copy ⿻ icon next to each availability to copy that day's availability on all enabled days.
Save your availability settings.
Step 5: Add Time Off
Mark time off to block unavailable periods on your Calendar.
How to Add Time Off:
Navigate to Time Off in the sidebar.
Click Add Time Off and specify the dates and times.
Optionally, add a note for reference (e.g., "Holiday Break").
Save your changes.
Step 6: Try Out the Booking Link
For users on the Armada (or Achiever) Plan, Booking Links make it easy for students and parents to schedule sessions.
How to Use Booking Links:
Go to Booking Links in the sidebar.
Copy your personalized link and share it via email or messaging apps.
Students and parents can use the link to book sessions directly into your Calendar.
Step 7: Start Adding Events
With your settings configured, begin scheduling sessions, consultations, or meetings. Adding events will make advanced features like filters, analytics, and scheduling tools even more powerful.
Step 8: Explore Calendar Views
Take a moment to familiarize yourself with the Calendar views:
Weekly View: Perfect for day-to-day scheduling.
Monthly View: Best for long-term planning.
Yearly View: Offers a high-level overview of your year.
Ready to Get Started?
Your Calendar is now ready to help you manage your schedule effortlessly. If you need further assistance, check out our other articles or contact our support team. With Evallo’s Calendar, managing your tutoring business has never been easier!